When a frying pan manufacturer sends you samples, the samples are the closest thing you get to a preview of your entire product line. The factory picks the best pieces, polishes them, and packs them carefully, so the sample is the product at its best. The question is not whether the sample looks good; it is whether the sample passes the three checks that predict retail performance: base flatness, handle stability and coating uniformity. These three specifications cause most of the returns, complaints and failed reviews in the frying pan category, and all three can be checked on a sample with simple tools. This guide walks through each check, how to perform it, and how to turn the results into a specification for production.
Why sample evaluation decides your product line
A frying pan program is a long commitment. The container, the packaging, the listings and the marketing are all built around the product, and changing the product later means restarting the whole cycle. The sample stage is the cheapest point in that cycle to catch a problem: a $5 sample can reveal an issue that would cost thousands in returns if it shipped in a container.
The three checks below are not the whole evaluation, but they are the ones that predict the most common failure modes. A pan with a warped base heats unevenly and annoys every customer. A pan with a loose handle fails during cooking, which is a safety complaint, the worst kind. A pan with patchy coating loses its non-stick claim and generates a stream of “does not work” reviews. Each of these can be measured in minutes on a sample, and each should be written into the spec that the factory holds during production.
Check one: base flatness
Base flatness is the single most important physical property of a frying pan. A flat base sits evenly on the burner, transfers heat uniformly, and works on induction hobs, which require direct contact with the magnetic surface. A warped base rocks on the stove, heats unevenly, and fails on induction, which is a growing share of the market in Europe and other regions.
The check is simple. Place the pan on a flat, clean surface, such as a granite slab or a piece of float glass, and see if it rocks. Then place a straightedge across the base and measure the gap with a feeler gauge. For a good quality pan, the gap in the center should be very small; a common tolerance is less than 0.5 mm across the base diameter. If the pan rocks visibly or the gap is more than 1 mm, the base is already out of spec before production, and production will only make it worse.
Base flatness also matters over time. A pan that starts flat can warp under high heat, especially if the base is thin or the material is uneven. When you evaluate the sample, also ask the manufacturer what flatness tolerance they hold after thermal cycling, meaning after heating and cooling repeatedly. A manufacturer who can state that number has tested the pan; one who cannot has not.
Check two: handle stability
Handle stability is the safety check. A frying pan handle carries the full weight of the pan plus the food, and a customer lifts a hot pan dozens of times. If the handle loosens, wobbles or detaches, it is not just a defect; it is a burn and injury risk. Handle attachment is usually either riveted or welded, and each method has its own failure mode. Rivets can loosen if they are too small or poorly set; welds can crack if the joint is weak.
On the sample, test the handle the way a customer would. Grip the handle and try to twist it side to side; it should not move at all. Apply downward pressure as if lifting a full pan; there should be no flex at the joint. Check the rivets or weld from the inside and outside: rivet heads should sit flush, and welds should be clean with no cracks. Then check the handle material: a plastic handle should be heat-resistant to a stated temperature, usually at least 180 degrees Celsius for short oven use, and a metal handle should have a comfortable grip or a heat shield.
| Handle check | How to test | Pass criteria |
|---|---|---|
| Twist resistance | Grip handle and twist side to side | No movement at the joint |
| Lift test | Apply downward pressure as if lifting a full pan | No flex or creak at the attachment |
| Rivet inspection | Check heads from inside and outside | Flush, tight, no play |
| Weld inspection | Inspect the joint line | Clean, no cracks or voids |
| Heat rating | Check the handle material spec | Stated heat resistance matches your use case |
Do not skip the handle check because the sample looks nice. Handles are the most common cause of safety-related complaints in the frying pan category, and a loose handle is the kind of defect that ends up in a negative review with a photo. The sample is the time to verify that the attachment is engineered for the pan’s size; a small rivet on a large pan is a red flag regardless of how the sample feels on day one.
Check three: coating uniformity
For non-stick pans, the coating is the product. The customer buys the non-stick promise, and the coating determines whether the promise holds. Coating problems come in three forms: uneven thickness, which creates thin spots that wear out first; incomplete coverage, where the coating does not reach the edges or the rivets; and poor adhesion, where the coating peels or flakes after use.
On the sample, inspect the coating surface under good light. The color should be uniform across the cooking surface, with no lighter or darker patches. Run a fingernail or a soft tool across the surface; it should be smooth with no raised or rough areas. Check the edges and the rivet area, where coating problems concentrate. Then check the coating-to-metal transition at the rim: the coating should end cleanly, not chip or peel at the edge.
Coating adhesion cannot be fully tested by hand, but there are two practical proxies. First, ask the manufacturer for the coating test results, such as the adhesion test and the scratch test used in their QC. Second, request the coating thickness if the factory measures it; typical non-stick coating thickness is measured in microns, and a specification of 15-25 microns is common for good-quality PTFE coatings, though the exact range depends on the coating system. If the factory cannot provide any coating data, treat the coating as unverified.
| Coating check | What to look for | What to ask the manufacturer |
|---|---|---|
| Color uniformity | No lighter or darker patches on the surface | What coating system and thickness is used? |
| Surface smoothness | Smooth, no raised or rough areas | What adhesion test is run in QC? |
| Edge coverage | Coating ends cleanly at the rim, no chips | How is the rim masked or finished? |
| Rivet/transition areas | Coating covers without peeling at fasteners | Is there a touch-up process after assembly? |
| Adhesion evidence | Test records or coating data sheet | Can you share the coating test report? |
Other checks worth running while you have the sample
The three headline checks should be part of a broader sample review. Weigh the pan and compare the weight to the spec; a pan that is lighter than expected may have thinner material than quoted. Measure the diameter and depth against the spec. Check the thickness of the base with calipers if you have them. Run a quick heat test on a stove if you can: heat the pan empty for a minute and see whether the base warps and how evenly the heat spreads; then let it cool and recheck flatness.
Check the packaging too, even though it is not the pan itself. The sample packaging shows what the customer receives, and a pan that arrives dented or scratched will generate returns no matter how good the pan is. Ask for the production packaging spec, not just the sample packaging, because the sample is often packed with extra care.
Finally, taste the claims. If the factory claims the pan is induction-compatible, put it on an induction hob if one is available, or check whether a magnet sticks to the base. If it claims dishwasher safety, ask what test supports the claim. Every claim that matters to your listing should be verified or confirmed with the manufacturer before production, because your listing will repeat those claims to customers.
Building a sample evaluation checklist
The evaluation becomes a repeatable process when it is written down. Use a checklist with pass/fail criteria for each check, and keep the results for each sample. When you compare samples from different frying pan manufacturers, the checklist gives you an apples-to-apples comparison instead of a collection of impressions.
| Check | Tool | Pass criterion |
|---|---|---|
| Base flatness | Flat surface, straightedge, feeler gauge | No rocking; center gap under 0.5 mm |
| Handle stability | Hands, visual inspection | No movement, flush rivets or clean weld |
| Coating uniformity | Good light, fingernail test | Uniform color and surface; clean edges |
| Weight | Kitchen scale | Within spec, usually plus or minus 5% |
| Dimensions | Ruler or calipers | Diameter and depth match the spec |
| Heat test | Stove, thermometer if available | No warp after heating; even heat spread |
| Induction check | Magnet | Magnet sticks to the base if induction is claimed |
| Packaging | Visual inspection | Protects the pan in transit |
Score each sample and record the results with photos. The photos are useful later when you compare the sample to the production batch; if the production pans look different from the approved sample, the photos are the evidence that the factory changed something.
Turning sample results into a production specification
The sample evaluation only pays off if the results become a specification. Write the pass criteria into the order sheet: flatness tolerance, handle attachment method, coating system and thickness, weight range, and dimensions. Attach the approved sample photo and any reference measurements. Then tell the factory that production will be checked against these criteria and that a pre-shipment inspection will verify them on the finished batch.
The specification should also include the QC method: how flatness is measured, how many pans are checked per batch, and what happens when a pan fails. A factory that measures flatness on every pan with a simple fixture is more reliable than one that checks only a sample. The specification turns your sample evaluation from a one-time judgment into an ongoing quality gate.
For the first production run, request a pre-production sample from the actual production line, not from the sample department. The production-line sample reflects the real process, including the coating application and the handle assembly, and it is the last chance to catch a discrepancy before the container is packed. Keep the approved production sample as the reference for the whole order.
Common mistakes in frying pan sample evaluation
The first mistake is evaluating the sample in isolation, without a checklist. The second is trusting the sample’s looks and skipping the physical checks, especially flatness and handle stability, which are not visible in photos. The third is accepting the factory’s coating claims without asking for test evidence; every non-stick pan claim should be backed by a test report or a written specification.
The fourth mistake is comparing samples from different manufacturers without controlling the test conditions. Flatness checks on different surfaces, heat tests on different stoves, and coating inspections in different light produce misleading comparisons. Use the same tools and the same procedure for every sample. The fifth mistake is forgetting that the sample is the best case; production will be slightly worse, so build margin into the pass criteria. If the sample is borderline on flatness or handle stability, assume production will fail.
The sixth mistake is not involving the people who will use the product. If the frying pans are for a commercial kitchen, have a chef test the sample; if they are for retail, have someone simulate the unboxing and first use. The hands-on test catches ergonomic problems that the measurements miss, such as a handle that is uncomfortable, a pan that is too heavy, or a coating that feels slippery.
FAQ: How much does base flatness tolerance matter for induction cooktops?
Answer: A lot. Induction cooktops require direct, continuous contact between the pan base and the glass surface to transfer energy efficiently. A pan with even a small warp will heat slowly, unevenly, and may make noise. If you plan to sell into induction-heavy markets, hold the flatness tolerance strictly and confirm the pan passes the magnet and contact test before production.
Communicating findings with the frying pan manufacturer
The sample evaluation is also the start of the working relationship. When you find issues, share them clearly with the manufacturer: reference the checklist, include photos, and state what needs to change. A serious factory will treat the feedback as a specification to meet; a weak one will argue that the sample was fine. The response to your sample feedback tells you a lot about how the factory will handle a defect claim later.
Give the factory the chance to correct the issues and resend the sample. A second round of samples is normal and cheap. What is not normal is a factory that refuses to adjust the product or cannot explain how it will meet the spec. When the resubmitted sample passes the checklist, approve it in writing and proceed to production with the specification attached.
The sample stage is where the frying pan product line is actually designed, even though the design work happens in the buyer’s evaluation rather than in the factory’s drawing office. The buyers who run disciplined sample evaluations build product lines that survive contact with real customers; the buyers who skip the checks learn the same lessons from returns and refunds.
FAQ: Should I pay for samples from a frying pan manufacturer?
Answer: Sometimes, and it is usually a good sign when a factory charges a small sample fee. Free samples are common for stock items, but a factory that charges for custom samples is typically protecting its design work and will often credit the fee against the first order. Treat the sample fee as part of the evaluation budget, and confirm whether it is refundable against an order before you pay.
A sample evaluation session in practice
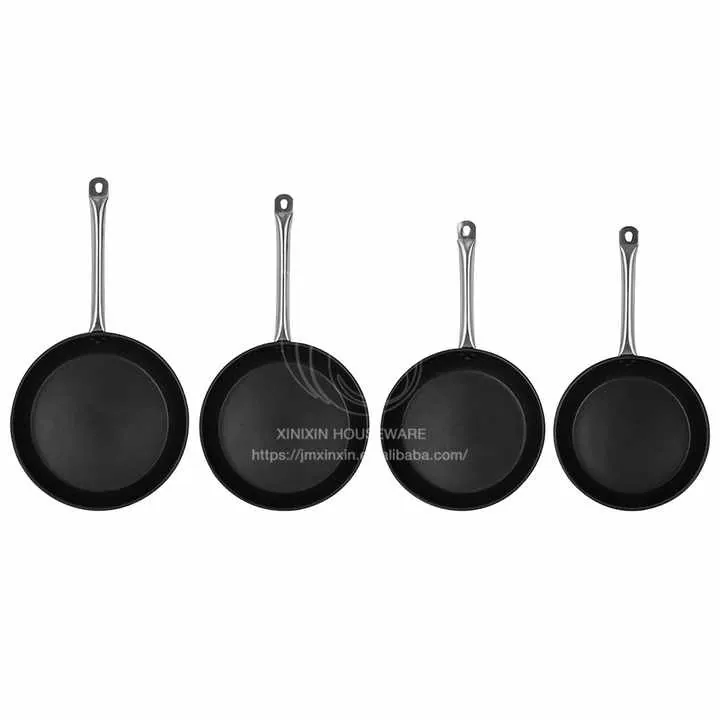
To show how the checks fit together, walk through a real evaluation session. A buyer has received three frying pan samples from three different frying pan manufacturers, all 28 cm non-stick pans with similar prices. The buyer sets up a flat granite surface, a straightedge, a set of feeler gauges, a kitchen scale, a magnet and a notebook, and runs every sample through the same sequence.
Sample one fails the flatness check immediately: it rocks on the granite surface, and the straightedge shows a 1.5 mm gap in the center. The handle passes the twist test, but the coating has a lighter patch near the edge, which suggests uneven thickness. The buyer sets sample one aside. Sample two is flat, with a center gap under 0.5 mm, and the handle is rock solid, but the weight is 20% below the quoted spec, which suggests the material is thinner than promised. The buyer notes the discrepancy and asks the factory for the actual material thickness. Sample three passes all three headline checks: flat base, stable handle, uniform coating, and the weight matches the spec within 3%.
The buyer then runs the secondary checks. Sample three passes the magnet test for induction compatibility, heats evenly on the stove test and returns to flat after cooling. The packaging survives a basic drop simulation. The factory provides a coating thickness spec and an adhesion test report for the coating system. The buyer approves sample three, writes the pass criteria into the order specification, and requests a production-line sample before the full batch.
The session takes about an hour, and it produces three things: an approved reference sample, a written specification with measurable pass criteria, and a comparison across suppliers that is fair because every sample went through the same procedure. That hour is the cheapest quality control the buyer will run on the product line, because every later step, the production sample, the pre-shipment inspection and the customer reviews, builds on the decisions made at the table.
Frequently Asked Questions
What are the most important checks when evaluating frying pan samples?
Base flatness, handle stability and coating uniformity are the three that predict the most common complaints. Add weight, dimensions, heat behavior and packaging to the review. Use the same tools and procedure for every sample so the results are comparable.
How do I check if a frying pan base is flat?
Place the pan on a flat surface and see if it rocks, then run a straightedge across the base and measure the gap with a feeler gauge. A good-quality pan should have a center gap under 0.5 mm and should not rock at all.
What makes a frying pan handle stable?
The attachment method, rivet or weld, must be engineered for the pan size, and the joint must have no movement under twisting or lifting pressure. Check that rivets sit flush or that welds are clean, and confirm the handle material’s heat rating matches your use case.
How can I tell if a non-stick coating is good quality?
Inspect for uniform color and a smooth surface, check the edges and rivet areas for coverage, and ask the manufacturer for coating test evidence such as adhesion and scratch tests plus the coating thickness. A claim without test data is just a claim.
Why does base flatness matter for induction cooking?
Induction cooktops transfer energy through direct contact with the pan base. A warped base reduces contact, slows heating and cooks unevenly. In induction-heavy markets, hold the flatness tolerance strictly during sample evaluation and production.
Sample evaluation is the cheapest insurance a frying pan buyer can buy. Run the flatness, handle and coating checks with a written checklist, turn the results into a production specification, and verify the production line against the same criteria before the container ships. If you are sourcing frying pans or a full cookware line and want a manufacturer who can hold these specifications in production, send your product list and target quantities through our contact page and we will confirm what we can support. You can also browse our cookware product range and kitchenware product range to shortlist the categories for your first order.